Showing posts with label fruit. Show all posts

Friday, September 9, 2011

Berries and Chocolate


Growing up with my parents meant learning how to say thank you. You say thank you when someone passes you the broccoli at the table, you send a thank you card when given a gift, and when someone goes out of their way to really do something nice, you say thank you in style, like this platter of berries and chocolate.


My mom really wanted to say thank you to a local dental office after they went above and beyond to beautify her smile. We put our heads together and decided on a platter of fruit and chocolate. Costco had a gorgeous selection of Rainier cherries, strawberries and blackberries, so we went with those. We then set to work making Funfetti cakeballs, raspberry cheesecake bites, and Ghiradhelli brownie bites (from the boxed mix).

It turned out to be a really fun platter to deliver, and it was definitely a crowd pleaser. You could do something like this for a shower, a party, or a fun way to surprise a loved one. And of course, it's a wonderful way to say thank you!

Monday, July 25, 2011

Asian Shrimp, Mango and Avacado Slaw


Hello my friends, I've missed you! The month went so fast, but what a great month. Lots of relaxing, boating, swimming, playing and EATING. Spending all that time with family was so nice and we had a great time, but it also feels good to be back in the comfort and quiet of home.


I have to post this salad because it's what my mom and I ate the most when we were together. Cathy, who's got a great blog at Wives with Knives posted this a few months ago. I immediately bought the ingredients, absolutely loved it, and promptly sent my mom the recipe. Since then I'm fairly confident that her and my dad have enjoyed it at least ten times. We have tried the creamy dressing as well as the vinaigrette, and honestly they are both delicious. The only change we made was adding a bit of red pepper to the slaw, and a scoop of peanut butter to the dressing. The slaw lends itself to a lot of variations, like Cathy says, but guaranteed delicious. Check out the recipe here, and thank you Cathy!


And now a few pics of one of our best boating days. We combined a day at the lake with a my mom's birthday and it was a fabulous day. My entire family was there and we had an absolute blast. I never laugh as hard as I do when I'm with these people.


I love this shot, my husband, who really hasn't done a whole lot of waterskiing, has absolutely no fear. The very first time he got up he was catching air. He did have his fair share of wipeouts though, as you see here.


Taking a tube ride with our son. He's braver then I am, I caught him laughing during some moments that had me white knuckled.


Hanging out on the Big Mable with two of my brothers. Seriously the funniest people I know.


My little girl taking a swim. Her favorite part of the day was just being able to jump off the boat into the water.


Me and my guy.


My daughter and her grandma, the birthday girl.


My son and his cousin. Two of the best friends and worst enemies at the same time, you know how it is at that age, haha!

How has your summer been so far? What are you doing to beat this heat?

Wednesday, May 25, 2011

Simple Yogurt Parfaits


I worry a lot about what I feed my kids. Living in a world where exercise is limited for kids, and junk food is widely available, I like to do as much as possible to keep them healthy and active. One of my hardest times is when my daughter comes home from school absolutely starving. I'm always on the lookout for healthy snacks that won't fill her up too much before dinner.


This particular snack was a total hit, and super easy. Just any flavor of yogurt, layered with any type of fruit and granola. And since my daughter is quite fancy, the pretty cup didn't hurt either. It's such a simple idea that I'm almost embarrassed to post it, but if you're in the same boat as me, you're up for any snack ideas. So I'll ask you guys...

What kinds of healthy snacks and meals do you feed your kids, grandkids, nieces or nephews? Any tips to get them to eat healthier foods?

Friday, February 11, 2011

Glazed Apple Fritters


I'm usually not very good at posting food items for specific holidays, simply because by the time I make it, the holiday is over and we've all moved on. However, I do have a lovely little treat for you for Valentine's Day. But I don't get the credit for this one.

A few Sundays ago we had friends over for a game night and desserts. Our friends brought the stuff for apple fritters and fried them up in our kitchen so we got them hot and fresh. Now, I'm really not a huge dessert girl. I'd much rather spend my calories on the savory foods like pizza, burgers and nachos, but OH. MY. GOSH. I could not stop eating these. They were sweet, perfectly oily, tender, but chunky...yeah, sorry I have to stop before the drool hits my keyboard. It took me a whole week to work these babies off, but it was worth every step on the treadmill, they were to die for!

Glazed Apple Fritters
By Cooks Country, made by Deborah, muah!

Ingredients

2 Granny Smith apples, peeled, cored and cut in 1/4-inch pieces
2 cups all purpose flour
1/3 cup granulated sugar
1 tablespoon baking powder
1 teaspoon salt
1 teaspoon ground cinnamon
1/4 teaspoon ground nutmeg
3/4 cup apple cider
2 large eggs, lightly beaten
2 tablespoons unsalted butter, melted
3 cups peanut or vegetable oil

Glaze:
2 cups confectioners' sugar
1/4 cup apple cider
1/2 teaspoon ground cinnamon
1/4 teaspoon ground nutmeg

Directions

1. Spread prepared apples in single layer on paper towel-lined baking sheet and pat thoroughly dry with paper towels. Combine flour, granulated sugar, baking powder, salt, cinnamon and nutmeg in large bowl. Whisk cider, eggs and melted butter in medium bowl until combined. Stir apples into flour mixture. Stir in cider mixture until incorporated.

2. Heat oil in Dutch oven over medium-high heat to 350 degrees. Following step 1, use 1/3-cup measure to transfer 5 heaping portions of batter to oil. Press batter lightly with back of spoon to flatten. Fry, adjusting burner as necessary to maintain oil temperature between 325 and 350 degrees, until deep golden brown, 2 to 3 minutes per side. Transfer fritters to wire rack set inside rimmed baking sheet. Bring oil back to 350 degrees and repeat with remaining batter. Let fritters cool 5 minutes.

3. Meanwhile, whisk confectioners' sugar, cider, cinnamon and nutmeg in medium bowl until smooth. Top each fritter with 1 heaping tablespoon glaze. Let glaze set 10 minutes. Serve.

Monday, February 7, 2011

Roast Pork Loin with Pineapple-Raisin Sauce


I like pigs. They're cute, chubby, seem to have a sweet enough disposition, and they taste so good! They give us bacon in the mornings, ham during the holidays, and delicious pork loins, ribs and chops the rest of the time. And the best part is that a lot of these cuts of meat are lean and quite healthy in moderation. Sorry vegetarians, but I just don't see myself splitting up with meat any time soon, 'specially the delicious pig!

I absolutely loved this combination of savory garlicky pork covered in this tangy sweet sauce. The sauce was very reminiscent of a chutney to me, and I couldn't get enough of it. I started out with a thin layer on my pork, but the more I ate the more I piled on, the flavor is just delicious. If you don't like fruit with your meat, might I suggest leaving the sauce out and just trying the pork loin. After inserting entire garlic cloves and coating with herbs, the pork itself is just lovely. Enjoy!


Roast Pork Loin with Pineapple-Raisin Sauce
Cuisine Magazine December 2010

Ingredients

1 2-3 lb pork loin roast
1 tablespoon olive oil
1 tsp. dried rosemary
1 tsp. dried sage
1 tsp. dried thyme
3 cloves garlic, cut in half
salt and pepper to taste

SAUCE:
1 8 oz can crushed pineapple
1/2 cup packed brown sugar
1/2 cup raisins
1/2 tsp. ground ginger
1 tablespoon cornstarch
1/2 cup chicken broth
1 tablespoon white wine vinegar

Directions

Preheat oven to 500 with oven rack in center position. Line a shallow roasting pan with foil. Let pork roast stand at room temp 30 minutes.

Combine oil, rosemary, sage and thyme in a small bowl.

Pierce top of pork to make six slits 2-inches apart on either side. Insert garlic half into each slit.

Score top of pork by cutting in a crisscross pattern. Rub herb mixture onto pork.

Roast pork 20 minutes, then flip and roast until an instant-read thermometer inserted in thickest part of the pork registers 145 and meat is slightly pink, 20 minutes more. Remove pork from pan, tent with foil and let rest 10-15 minutes before slicing.

Stir together pineapple and brown sugar for the sauce in a small sauce-pan over medium heat until sugar dissolves, 3 minutes. Add raisins and ginger.

Whisk cornstarch and broth together, then slowly add to pineapple, stirring constantly. bring sauce to a boil until thickened. Stir in vinegar and serve with pork roast.

Per Serving: 236 cal, 6g fat, 25g carb, 1g fiber, 19g prot

Friday, February 4, 2011

Homemade Balsamic Vinaigrette


Check that baby out! My sweet husband got if for me for Christmas after I told him to after a few weeks of flirtatious hinting and winking. Anyway, it's a fun dressing mixer, specifically for vinaigrettes, squeezing the handle on the side emulsifies the oil and vinegar. It even has recipes on the side with the measurements included, making it so easy to throw a delicious dressing together. Is is essential to make your own vinaigrettes? no. Does it provide hours of super fun entertainment, especially during these cold winter days? you know it!

The first time I used my fun new contraption, I made was balsamic vinaigrette. I've had plenty of balsamic vinaigrettes in my day, and while I like them, I've never LURVED them or anything. Well, I do now!

I don't know what it was about this dressing, maybe it was the fresh ingredients, or the fact that I got to sit and mix it myself while giggling like a nerd, but it was so delicious. Tangy, fruity, sharp. Once again, I looked forward to eating my salad because of this vinaigrette. I'm telling you, homemade is the way to go!

Homemade Balsamic Vinaigrette

Ingredients

1/2 olive oil (I actually probably did about 1/3 cup to lighten it up a bit)
1/4 cup balsamic vinegar
2 crushed cloves garlic
salt and pepper to taste

Directions

Combine all ingredients and mix until well combined. Toss in salad. My favorite salad for this dressing has diced apples, cranberries, toasted almonds and diced sharp cheddar cheese. Totally delicious.

Tuesday, November 30, 2010

Leftover Cranberry Sauce Muffins


Call me crazy, but among all of the star dishes of thanksgiving, I honestly think my very favorite is homemade cranberry sauce. I'll never go back to the canned version again, there's no comparison! But I don't just love to eat homemade cranberry sauce, it's fun to make. My favorite part is listening to the POP POP POP of the cranberries, I'm not going to lie, it makes me giggle like a five year old. But then after it's been made, it chills into a thickened tart treat that goes well with just about every meat and side of the meal.

Unfortunately I'm one of the only ones in my family that feels that way, which consequently leaves me with about a gallon of the stuff left when the holiday is over (you'd think halving the recipe would have dawned on me by now, but it hasn't). So you can imagine how thrilled I was when I saw these beauties on Maria's blog at Two Peas and Their Pod. This is not the first time I've made something from her blog, and it certainly won't be the last. She consistently posts the most delicious dishes and gorgeous pictures.

These muffins were a real family pleaser, I've already made two batches and will most likely be going for a third! My first batch are what you see in the pictures. My second batch I got a bit lazy and just threw the cranberry sauce right in the batter. It turned the them a delightful shade of pink and infused cranberry flavor in the whole muffin. Both were just delicious. If you have extra cranberry sauce on your hands, I highly recommend these. Thanks Maria!


Leftover Cranberry Sauce Muffins
By Two Peas and Their Pod

Ingredients

1 1/2 cups all-purpose flour
1/2 teaspoon salt
2 teaspoons baking powder
1/4 teaspoon cinnamon
1/2 cup granulated sugar
1 tablespoon orange zest
1/4 cup canola oil
1 large egg
1/3 cup milk
1 teaspoon vanilla extract
3/4 cup fresh cranberry orange sauce (about 2 tablespoons per muffin)

Directions

1. Preheat oven to 400 degrees. Line a muffin tin with paper liners or grease well. Set aside.

2. In a medium bowl, whisk together the flour, salt, baking powder, and cinnamon. Rub in sugar and orange zest together. Whisk into dry ingredients.

3. In a separate medium bowl, whisk canola oil, egg, milk, and vanilla together.

5. Incorporate the wet ingredients into flour mixture. Add slowly and gently stir together. The batter will be thick.

6. Place half the batter at the bottom of six muffin cups. Spoon about two tablespoons of fresh cranberry sauce on top of the muffin batter. Top muffins evenly with remaining muffin batter. Sprinkle each muffin generously with turbinado sugar.

7. Bake muffins for 15-17 minutes, or until muffins are golden brown and a toothpick comes out clean. Remove the muffins from the pan and let cool on a cooling rack.

Makes 6 large muffins

Wednesday, September 1, 2010

Banana-Butterscotch Upside-Down Chocolate Cake


I recently bought this book, because if there's one thing I need, it's a cookbook dedicated to nothing but chocolate cakes, am I right?


I haven't made too many things out of it yet, mostly for the sake of my never-ending diet, but it did come in handy when I had a few bananas that were reaching the end of their lives. What is it about those last two or three bananas? We are never able to finish off that bunch. But when you get something like this as a result it's hard to complain too much. It was fun to make a cake so different like this, and my favorite part was the butterscotch sauce. The recipe is a bit extensive, but it's still a surprisingly easy cake to put together. Enjoy!

Banana-Butterscotch Upside-Down Chocolate Cake
By Chocolate Cakes

Ingredients

BUTTERSCOTCH SAUCE:
1/2 cup heavy cream
1/4 cup unsalted butter at room temp
1/2 cup packed dark brown sugar
1/4 teaspoon salt
1/4 cup golden corn syrup (I just used light)
3 large ripe but firm bananas, cut into 1/2 inches

CAKE:
1 cup cake flour
1/3 cup unsweetened dutch-process cocoa powder
1/2 tsp baking soda
1/4 tsp salt
6 tablespoons unsalted butter at room temp
1/2 cup brown sugar
2 large eggs
1 tsp vanilla extract
2/3 cup buttermilk


Directions


1. Position a rack in the middle of the oven. Preheat to 350. Butter a 9-inch square baking pan with side 2 inches high. Line with a piece of aluminum foil long enough to extend over opposite sides of the pan.

2. To make the butterscotch sauce: In a medium saucepan, cook the cream, butter, brown and granulated sugars, salt, and corn syrup over low heat, stirring occasionally, until the butter and sugars are melted. Increase the heat to medium-high, bring the sauce to a boil, and boil, stirring constantly, for 1 minute. Pour the sauce into the prepared pa n, tilting the pan if necessary to spread it evenly. Arrange the banana slices in rows over the sauce, placing them close together. Set aside.

3. To make cake, sift the flour, cocoa powder, baking soda, and salt into a medium bowl and set aside. In a large bowl, using an electric mixer on medium speed, beat the butter and granulated and brown sugars until smoothly blended, about 2 minutes. Stop the mixer and scrape the sides of the bowl as needed. Add the eggs one at a time, beating until each is blended smoothly into the batter and the batter looks creamy, about 2 minutes. Mix in the vanilla. On low speed, add half of the flour mixture, mixing just to incorporate it. Mix in the buttermilk to blend it into the batter. Mix in the remaining flour mixture until it is incorporated and the batter is smooth. Scrape the batter evenly over the bananas. Gently smooth the top.

4. Bake just until the top feels firm when lightly touched and a toothpick inserted in the center of the cake, but not the bananas, comes out clean, about 35 minutes. Cool the cake in the pan on a wire rack for 10 minutes. Invert the cake onto the rack. Carefully remove and discard the foil. If any bananas stick to the foil, replace them on the cake. Cool the cake thoroughly on the wire rack for about 1 hour. Transfer the cake to a serving plate.


Sometimes you win and sometimes you lose when trying new recipes. This chocolate peanut butter mousse cake was unfortunately a loss for me. The cake was too dry, the mousse was too sweet and the ganache was a bit bitter for my taste, such a bummer because it was SO MUCH WORK! Oh well, live and learn right! Here's hoping for a win on my next cake!

Sunday, August 15, 2010

Pepper Jack, Chicken, and Peach Quesadillas


I think if I had to be any food, it would be a quesadilla. I mean, is it even possible not to like quesadillas? They are about the most friendly food in the world, they practically smile at you with that crispy rounded tortilla. Not to mention the fact that they are filled with whatever fabulous ingredient you want, bound together by gooey, melty, cheese. No utensils required, the quesadilla doesn't require any work on your part. You get to use your hands, and you don't even mind that your fingers are dripping with those wonderful juices and oils when your done.

Being a quesadilla also mean continuously donning a new outfit with different meats, cheeses and tortillas. Sometimes you go simple with a plain flour tortilla and cheddar cheese. And other times you get a little funky, like spicy pepper jack, juicy shredded chicken and sweet ripe peaches. Talk about dressing for a party! And don't be afraid to try this combo on for size. It might sound a little daring, but it comes together wonderfully, and the honey lime sauce on the top is the perfect accessory to bring the whole thing together. So if you're looking for an old favorite with a bit of a twist, head over here for the recipe. I hope you like it as much as I did!

Friday, August 13, 2010

Liege Waffles


Believe it or not, there is actually a waffle under that big mountain of goodness. Here is the story behind this waffle.

The other night my husband and I were watching the Travel Channel where they were featuring all of the most unusual fast food joints in the country. One of them was a "waffle cart" where genuine Belgium waffles were sold, some as breakfast waffles, and others as dessert waffles.

If I remember right (and feel free to correct me), the traditional Belgium waffles that we're used to is from Brussels and is light, fluffy and has the thin batter. That is the waffle that is usually served for breakfast. And then there is a waffle that we don't see quite as much, from Liege, in southern Belgium. The batter is much thicker, more like a sticky dough that has much more sugar. This waffle, while I'm sure would still be delicious covered in syrup (what isn't?), is much better as a dessert, covered in things like chocolate, ice cream and...stuff like that.

About two and a half minutes after watching this special, my husband had a printed recipe in his hand and a smile on his face. Needless to say, we enjoy the famous Liege waffles at home that night, and they are delicious! Much sweeter, denser and cake-like, they are the perfect pallet for any embellishments you want to add. This would be a lot of fun to entertain with, especially if your guests had a nice choice of toppings. Either way you should give it a try. It's a fun new way to use that waffle iron!

Liege Waffles
Source Unknown

Ingredients

2 cups flour
1 cup pearl sugar (regular granulated is fine)
1 cup melted butter
3 eggs
1 (1/4 ounce) package yeast
1/3 cup lukewarm water
1 1/2 tablespoons sugar (add some vanilla sugar)
1/8 teaspoon salt

Directions

1. Take the lukewarm water and mix in yeast, 1 1/2 tablespoon sugar and salt. Let the yeast develop for 15 minutes. In the meanwhile you can melt the butter, but be careful - do not burn it.

2. Now take a large bowl and put in the flour, make a hole in the middle, pour in the yeast that you made in step one. Also add eggs and melted butter and knead until you get nice and even dough. Then let it rest so the yeast does it's magic and the dough doubles.

3. Now take pearl sugar and gently mix it in.

4. Again, let it rest for 15 minutes, in the meanwhile you can turn on the waffle maker so its nice and hot.

5. All there is left is to pour the waffle dough into the waffle maker and bake for 3-5 minutes (it's going to be thick and sticky, so there's going to be less pouring and more scooping). Because we mixed in the sugar late in the process it will melt and caramelize and give that special Liege waffle taste. Just be careful when you take them out of the waffle maker, caramelized sugar can make them sticky.

Monday, August 2, 2010

Coming Back With Some Food Reviews

Hi everyone! It's so good to be home, although jet lag is a beast! Who would have thought that three measly hours could cause so much damage. Hopefully we'll be back to a more normal schedule soon, but in the meantime, we're enjoying a little vacation after our vacation.


Over the last few months I've been able to sample a few more new products sent to me by Foodbuzz. These are way overdue, but hopefully still useful. The first one was Mushroom Ravioli from Buitoni. I didn't do a whole lot with this ravioli except drizzle a bit of olive oil and Pecorino Romano so that I could really focus on the pasta.

It. Was. So. Good.

My husband and I enjoyed this together, and there was absolutely no dialogue between us because we were too busy stuffing our faces. If you need a quick, inexpensive, and delicious dinner, I highly recommend this stuff. It looks like Buitoni has quite a few types and flavors of pasta that look just as delicious.


The second product I was able to sample were these Eggo Fruit Pizzas. I have to say, I loved the idea. A whole wheat waffle, topped with yogurt, granola and berries, a delicious combination. However, I wasn't crazy about the actual product. The waffle was a bit chewy, the yogurt flavorless, and the berries few and warped by the effects of the microwave. I would love to recreate it, but unfortunately, I don't see myself purchasing it again.

I hope you've all enjoyed your summers so far. I'm going to do my best to catch up with you all in the next few days, I'm excited to see what you've been up to! I've got a nice and healthy line up planned since I've got a few ~ahem~ vacation pounds to get rid of. Can't wait to see how it goes. Enjoy your week everyone, I'll be chatting with you soon!

Saturday, June 5, 2010

Cantaloupe, Proscuitto and Blue Cheese Salad and a Summer Break


I'm as giddy as a kid in a candy shop right now! By this afternoon I'll be greeted by two of my very favorite people in the world.


And it's so appropriate that we're sitting with food in this picture because one of things we love to do most, besides laugh, is EAT! We've already had several discussions on what we will be making and where we will be eating when they get here. My reason for sharing this is that I am going to be MIA, for a week, or month, or two. It's hard to say really, but I just really want to soak up all the time with my family while I have them with me.

But as a goodbye, I'd like to share my new favorite summer salad. When I came across this recipe in this month's edition of Cooking Light, I got scared, and then a little intrigued, and then really excited to make it. It's an interesting combination of foods, but all of their flavors come together so well, making this a very filling, yet very refreshing salad. Definitely give it a try, you can find the original recipe here.

A few changes I made, I couldn't find Cabrales cheese, so I just used a low-fat blue cheese, which was delicious. I also used red wine vinegar instead of sherry vinegar, but the second time, instead of making a vinaigrette, I just used my Newman's Own balsamic dressing, which was also very good. This is one that I can't wait to make for my mom and sister!

Enjoy your summer months! Soak up the sun, eat great food, and I'll be back soon to read all about it!

Sunday, May 2, 2010

Key Lime Bars


Any Dexter fans in the house? Gosh I love that show, it's got all the elements I love in entertainment, humor, romance, mystery, serial killers, I can't get enough!

But another thing I like about Dexter is that it's based in Miami, and every once and a while they'll throw bits and pieces in about the culture and the food! One particular episode highlighted the Key Lime Pie and a woman's search to find the perfect one. In it she mentioned that it needed sweetened condensed milk to make it the best. Well, after that I became obsessed, must. make. key lime. pie!


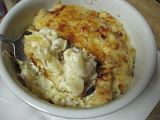
I didn't make an actual pie, but I did find a recipe for some great Key Lime Bars to take to a party. They were delicious, tart, creamy and I do have to agree with the character on Dexter, the sweetened condensed milk did make them great!

Key Lime Bars
Adapted from Recipezaar

Ingredients

5 ounces animal graham crackers
3 tablespoons packed light brown sugar
1 pinch table salt
4 tablespoons unsalted butter, melted and cooled slightly
2 ounces cream cheese, room temperature
1 tablespoon grated lime zest, minced
1 pinch table salt
1 (14 ounce) can sweetened condensed milk
1 large egg yolk
1/2 cup fresh lime juice
3/4 cup shredded sweetened coconut, toasted until golden and crisp (I didn't do this, but I have no doubt it would be delicious!)

Directions

1. Adjust oven rack to middle position and heat oven to 325°.

2. Cut about 12" length extra-wide heavy duty foil; fold cut edges back to form 7 1/2" width. With folded sides facing down, fir foil securely into bottom and up sides of 8" square baking pan, allowing excess to overhang pan sides. Spray foil with nonstick cooking spray.

3. In work bowl of food processor, pulse graham crackers until broken down, about ten 1 second pulses; process crumbs until evenly fine, about 10 seconds (you should have about 1 1/4 cups crumbs). Add brown sugar and salt; process to combine, ten to twelve 1 second pulses (if large sugar clumps remain, break them apart with fingers). Drizzle butter over crumbs and pulse until crumbs are evenly moistened with butter, about ten 1 second pulses.

4. Press crumbs evenly and firmly into bottom of prepared pan. Bake until deep golden brown, 18-20 minutes. Cool on wire rack while making filling. Do not turn off oven.

5. While crust cools, in medium bowl, stir cream cheese, zest, and salt with rubber spatula until softened, creamy, and thoroughly combined. Add sweetened condensed milk and whisk vigorously until incorporated and no lumps of cream cheese remain; whisk in egg yolk. Add lime juice and whisk gently until incorporated (mixture will thicken slightly).

6. Pour filling into crust; spread to corners and smooth surface with rubber spatula. Bake until set and edges begin to pull away slightly from sides, 15-20 minutes. Cool on wire rack to room temperature, 1 to 1 1/2 hours. Cover with foil and refrigerate until thoroughly chilled, at least 2 hours.

7. Loosen edges with paring knife and lift bars from baking pan using foil extensions; cut bars into 16 squares. Sprinkle with toasted with toasted coconut and serve. Can refrigerate for up to 2 days, crust will soften slightly. Let refrigerated bars stand at room temperature about 15 minutes before serving.

8.Can make triple citrus bars using 1 1/2 teaspoons each of grated lime zest, lemon zest, and orange zest (mince zest after measuring), and using 6 tbsp lime juice, 1 tbsp lemon juice, and 1 tablespoons orange juice.

Monday, April 26, 2010

German Apple Pancake


My husband and I balance each other out quite nicely when it comes to food. He likes sweet, I like savory. I like to cook, he likes to bake. I like dinner and party food, he likes breakfast. Actually, he LOVES breakfast. While I'm one to sprint out the door with not so much a granola bar in my hand (I'm not a breakfast fan, my stomach has a hard time with food in the morning), he'll wake up thirty minutes early every morning to make his waffles, eggs, bacon, or whatever other extravagant breakfast he can dream up. It's kind of cute actually, and I'm pretty sure the kids wake up early just because they know if they do, they're going to get a much better breakfast then if mom is making it!

So being the breakfast lover that he is, my husband really wanted to make a nice Easter breakfast. He found this recipe in my new America's Test Kitchen book, which I already love. If you are familiar with German pancakes, you already know that they are fluffy, and light with a fabulous unique flavor and texture. Add to that sweet chewy apples and it takes the German pancake to a whole new level. It was so delicious that even this non-breakfast eater went back for seconds. I highly recommend serving this with pure maple syrup, it's just better.

German Apple Pancake
America's Test Kitchen

Ingredients

1/2 cup all-purpose flour
1 tablespoon granulated sugar
1/2 teaspoon salt
2 large eggs
2/3 cup half and half
1 teaspoon vanilla extract
2 tablespoons unsalted butter
1 1/4 pounds apples (3-4) quartered, peeled and sliced 1/2 inch thick
1/4 cup packed light or dark brown sugar
1/4 teaspoon cinnamon
1 teaspoon fresh lemon juice
confectioner's sugar

Directions

1. Adjust an oven rack to the upper-middle position and heat the oven to 500 degrees. Whisk together the flour, granulated sugar, and salt in a large bowl. In another bowl, whisk together the eggs, half and half and vanilla. Whisk the wet ingredients into the dry ingredients until no lumps remain.

2. Melt the butter in 10-inch ovenproof nonstick skillet over medium-high heat. Add the apples, brown sugar and cinnamon and cook until the apples are golden brown, about 10 minutes. Off the heat, stir in the lemon juice.

3. Following the photos, quickly pour the batter around the edge of the skillet, then over the apples. Place the skillet in the oven and immediately reduce the oven temperature to 425 degrees. Bake until the pancake has risen above the edges of the skillet and is brown, about 18 minutes. Loosen the pancake edges from the hot skillet with a spatula and invert the pancake onto a large plate or serving platter (I never got a picture of our inverted pancake, dang it). Dust with confectioners sugar, and cut into wedges before serving.

Friday, February 12, 2010

HBi5: Red Beet Cheese Buns and Chocolate Cinnamon Bread


Happy Valentine's weekend! I really love Valentines Day. I love the aisles at the store that are full of pink and red. And I think it's great that we have a day to celebrate love, which according to John Lennon, is all we need!


The breads for this week were chosen wisely as they both reflect the holiday in different ways. The red beet buns were an obvious for their red color. I'll be honest, I wasn't that excited about this particular bread, but my curiosity kept me from skipping it. As it turns out, this has been my favorite so far! Of course the fact that I stuffed the buns full of cheese probably helped, but seriously, I loved the red "beety-onion-y" flavor of this bread. And the best part...my veggie/fruit hating son ate about three of these! (evil laughter...you're eating beets little boy!)

I made the dough per the instructions, and when it came time to bake them, I rolled the dough out to about an inch thickness, and spread garlic powder, Parmesan, mozzarella and sharp provolone. I rolled it up jelly style, sliced and baked. Pretty much like a savory cinnamon roll. The only downside is that the dough made my fridge smell pretty funky, but it was worth it. I'll be making this again!


The second bread was supposed to be a chocolate-espresso combination, but neither of us are coffee drinkers, and my husband finds the flavor of coffee abominable. So, instead I added a good helping of ground cinnamon for a nice subtle bite to the bread. Before baking the bread I worked in some extra chocolate chunks, the zest of an orange and some dried cherries and cranberries. It came out a very fun and pretty loaf of bread, but I wasn't too crazy about the taste. Since it's still a yeast bread, it never got too sweet and lacked a bit in flavor. It's basically something that you have to turn INTO a dessert. So I did what any sensible chocolate lover would do, smothered it in Nutella and strawberries. Now we're talking.


I think this bread has a lot of possibilities for a lot of fun desserts, however, I don't see myself making it again. I just think if I'm going to spend my calories making and eating a dessert, it's going to be something a little less...uh healthy!
Be sure to check out the other wonderful HBi5 entries here.

Have a wonderful Valentine's weekend my friends!

Wednesday, February 10, 2010

Blogtastic Eats

I've said it once and I'll say it again, the best things I've made have come from other people's food blogs. I mean, you guys really know your food! The tragedy is that there are SO many great bloggy dishes, and only three meals in a day, I never feel like I'll be able to try them all. But even if I don't, rest assured, your pictures and descriptions always leave me drooling, and hungry! Here are two great finds that I recently tried, and must be shared.


I found these fantastic meatballs over at Gina's Weight Watchers blog. And while I'm not quite as strict on the diet as I should be (ahem), I still really try to eat delicious but healthy foods like this. Have you ever tried the potstickers from Costco. No, not the ones in the freezer, the fresh one, made with chicken, yeah, those! Aren't they awesome? These meatballs taste A LOT like them. They even come with a similar tasting sauce. They are juicy and full of flavor and were a hit with the whole family. You can find the recipe here.
Thanks Gina!


The second thing we made was Coleen's Pineapple Banana Bread. This was a bread that I just couldn't get out of my head, and I'm so glad I didn't! It's like summer in bread form. With the combination of banana, pineapple and coconut, it's the closest you'll come to eating a Pina Colada. Definitely try this, especially if you are buried in three feet of snow and need some sunshine in your house! The recipe can be found here. Thanks Coleen! And here's a picture of my daughter when I told her we were going to make banana bread.


She gets excited.

Is anyone else out there having a snow day? Not only is my girl home from school, but my husband is as well! I have to tell you, waking up to a lazy weekday morning, and having aebelskivers with my husband is not a bad way to start the day, although I'm not quite sure about having the deal with the snow everytime. Stay warm my friends, and keep cooking up those wonderful dishes!